Showing posts with label food. Show all posts

18/03/2013

Restaurant Review: My Old Dutch (Holborn, London)


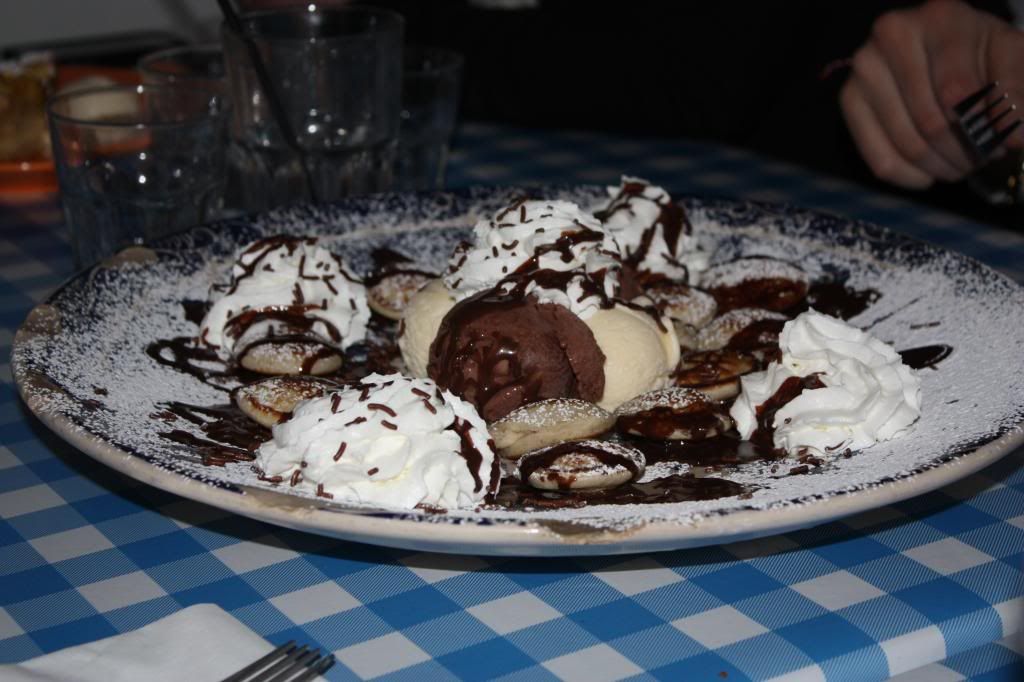
Poffertjes with ice cream and whipped cream

On the 6th of March it was my 19th birthday, and of course I had to celebrate this with my friends from uni. The night before my birthday we went out to Ministry of Sound, where Far East Movement was performing that night (and sadly it wasn’t that great…). On the day itself I took my friends out for dinner. This is something I’ve been doing every year for about 3 years now, as I think most people enjoy going out for dinner and it also gives you the opportunity to chat with each other. This time, it also gave my friends the opportunity to try some different food: Dutch food!

London, being as multicultural as it is, is actually home to a Dutch restaurant. This is something I still find quite surprising as the Dutch cuisine is not very famous and we don’t have many typically Dutch dishes. But we do have pancakes! This is also the main dish served at My Old Dutch, a Dutch-inspired restaurant with three locations around London (Holborn, Chelsea and Kensington). We went to the one in Holborn, as this is only a short tube ride away from our uni. A while back I also went to the one in Chelsea with a friend, so I more or less knew what to expect from the restaurant.

As I said, My Old Dutch serve pancakes. Pancakes for dinner? Yes, pancakes for dinner. In The Netherlands, we quite regularly eat pancakes for dinner (or at least in my family we do, and I think other families do too). At My Old Dutch the pancakes are Dutch, which means they are very big, the size of a big plate. Hence, one pancake is very likely to fill you up (and if not, don’t worry – they have desserts too!). The menu is quite varied, with a choice of sweet and savoury pancakes. In addition to pancakes, they also serve poffertjes (Dutch mini, puffy ‘pancakes’), various starters, salads and desserts. Not the whole menu is traditionally Dutch, I believe they also serve American-style pancakes, but it has certainly been inspired by Dutch culinary tradition.

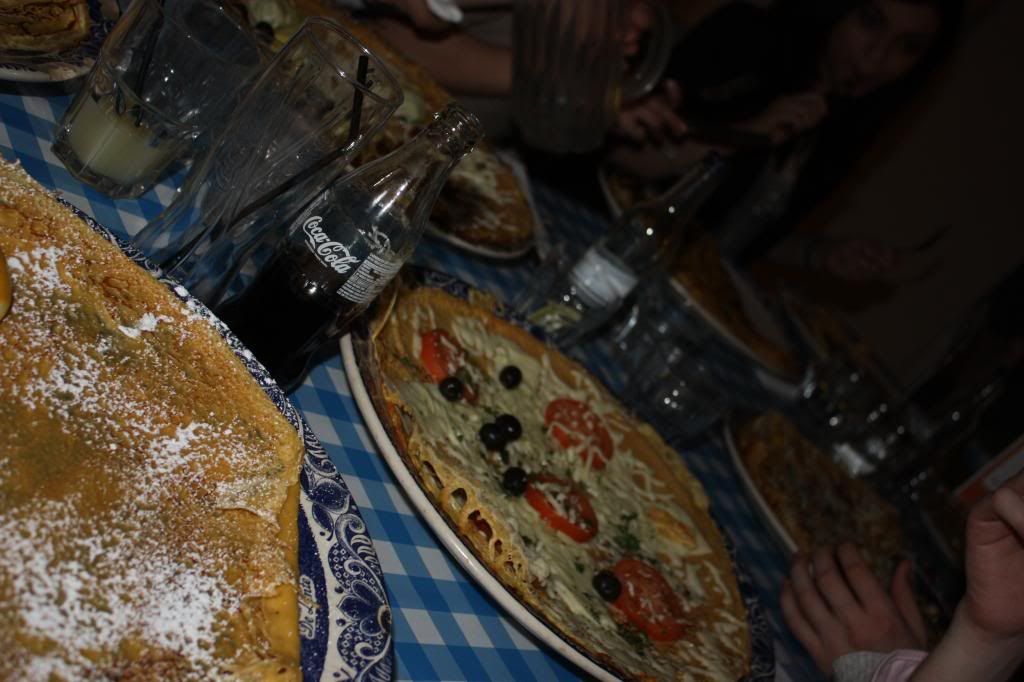
Some of the pancakes. Yes they do sometimes look like pizzas but they really are pancakes! (sorry about the quality/strange angle of the photograph, it was taken by my friend and unfortunately I don't have any better ones)

As a starter we ordered ‘bitterballen’ (Dutch meat-ragout balls) and ‘kaasballen’ (fried cheese balls). These were both very good, although the spiciness of the mustard to go with the bitterballen surprised some of my friends. Following this everyone had a pancake as a main course. We all had different pancakes, and I had a pancake topped with a compote of berries and scoops of vanilla ice cream. It was a delicious pancake, and in fact so large that I could not finish it! The only thing I was missing was a bottle of ‘stroop’ (syrup) on the table. I was surprised that we did not get this with our pancakes as there had been one on the table in the Chelsea restaurant. After the pancakes some of us weren’t full yet (there are a couple of big eaters, haha) and had a dessert. I shared Dutch apple pie with one of my friends. I was surprised that this apple pie did actually taste like a Dutch one does, although I personally would have liked it even more if there had been raisins in it as well. Some of the others shared plates of ‘poffertjes’ with ice cream and chocolate sauce and they told me they really enjoyed it!

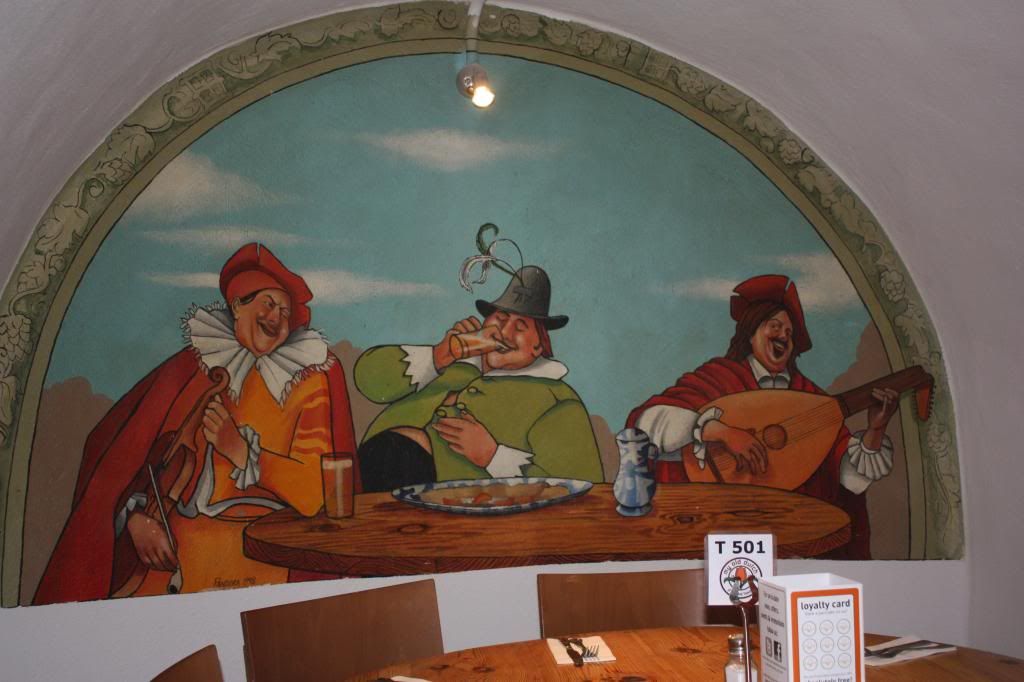
The murals add to the atmosphere, although they do not remind me of Dutch people/The Netherlands.

All in all we enjoyed our night at the restaurant and our Dutch-style meal. The interior is also inspired by The Netherlands. Even the plates our pancakes were served on had Dutch drawings of the seasons on them. I think the atmosphere of the restaurant is best in the upstairs area. We were brought to the basement and the atmosphere there was not as nice as it was rather massive, and the lamps above our table did not work so it was fairly dark.

I like:
- The restaurant provides me with a taste of home in London.
- The pancakes are the way you would find them in a Dutch pancake restaurant – very big!
- They serve some other Dutch foods such as bitterballen and poffertjes.
- Good value for money – a pancake costs around 8 or 9 pounds, depending on the topping you choose.
- My Old Dutch have a 10% discount for students! So don’t forget to take your student card.

I less like:
- The atmosphere could have been better – the lights need to be fixed.
- There was no ‘stroop’ on the table, something you find in every single Dutch pancake restaurant! I suggest putting a bottle of stroop and a can of sugar on the table so guests can add this to their pancake.
- The waitress added the ‘optional’ service to my bill without asking. Now I was happy to pay the service but if the service had been bad I would not have wanted to pay extra. If a service charge it is added to my bill without asking I feel like I cannot refuse and simply have to pay it.
- The online reservation system does not seem to work very well. I made an online reservation, and even received an email the day before reminding me of my reservation, so I assumed everything had worked out. However, when I came into the restaurant they only had a hand written system and my reservation was not noted down. I came in with 8 people and was lucky it wasn’t busy and we got a table immediately, but imagine if this happens when it is really busy! So the restaurant needs to either link their reservation systems or discard one of them to avoid problems.

All in all, I would visit My Old Dutch again and recommend it to anyone who is looking for a slightly unique meal with a taste of The Netherlands.

My Old Dutch Holborn can be found at:
131-132 High Holborn
Holborn
London
WC1V 6PS

More information can be found on their website: www.myolddutch.com

x Loes

28/01/2012

Double-Chocolate Marbled Loaf Cake


 On Thursday I only had to go to school in the morning for my Dutch oral, so I decided to use my free afternoon to bake something! In December I got 'The Great British Bake Off - How To Bake', an amazing book with lots of recipes for cakes and othe bakes. You might know The Great British Bake Off, it's a baking competition, and the second series was on BBC at the end of last summer. I watched the entire series and really enjoyed it, so I really wanted the book! The book contains recipes by the contestants, explanations of the technical challenges (such as Paul Hollywood's foccacia) and other recipes. I decided to bake the Double-Chocolate Marbled Loaf Cake, because I love chocolate and it did not seem all to difficult to make. This recipe makes 1 large loaf cake, you will need a 900 gram loaf tin which measures approximately 26 x 12.5 x 7.5 cm. Grease the loaf tin and then line it with a strip of greaseproof paper, this will make it easier to remove the cake from the tin.

Ingredients

For the sponge:
250 g unsalted butter, softened
250 g caster sugar
4 large free-range eggs, at room temperature
1 teaspoon vanilla extract
250 g self-raising flour
Good pinch of salt
75 g dark chocolate (70% cocoa solids), roughly chopped
75 g good-quality white chocolate, roughly chopped
1 tablespoon cocoa powder

To finish:
25 g dark chocolate (70% coca solids), roughly chopped
25 g good-quality white chocolate, roughly chopped
30 g unsalted butter, diced

Preheat the oven to 170 degrees Celcius/325 degrees Farenheit/gas 3. Put the soft butter in a bowl and beat with a wooden spoon or electric mixer for 1 minute or until creamy. Gradually beat in the sugar and beat thoroughly until the mixture turns pale and fluffy.

Beat the eggs with the vanilla just until combined, then gradually add to the creamed mixture, beating well after each addition; add 1 tablespoon of the flour with each of the last 2 portions of egg to prevent the mixture from curdling. Sift the rest of the flour with the salt into the bowl and gently fold in with a large metal spoon. Transfer half the mixture to another bowl.

Put the dark chocolate into a heatproof bowl and set over a pan of steaming hot (not boiling) water (don't let the base of the bowl touch the hot water). Melt gently, stirring frequently. Remove the bowl from the pan and leave to cool while you melt the white chocolate in the same way.

Sift the cocoa powder into one bowl of cake mixture. Add the cooled melted dark chocolate and mix gently until thoroughly combined. Carefully stir the cooled melted white chocolate into the other bowl of cake mixture. Spoon both mixtures into the prepared loaf tin, adding tablespoonfuls of each mixture alternately. Gently bang the tin on the worktop to eliminate any pockets of air, and carefully smooth the surface. Draw a chopstick or table knife through the two mixtures, swirling, to marble them.

Bake for about 1 1/4 hours or until a skewer inserted into the centre of the cake comes out clean. Set the tin on a wire rack and leave to cool for 20 minutes, then carefully turn out the cake onto the rack and leave to cool.

To finish, put the dark chocolate into one heatproof bowl and the white chocolate into another. Add half of the butter to each bowl, then melt gently as above. Using a teaspoon (or a small piping bag), drizzle the 2 chocolate mixtures over the top of the cooled cake. Leave to set, then wrap the cake in greaseproof paper or foil and leave for a day before slicing. Store in an airtight container and eat within 5 days.

My notes:
- For my oven, a fan-assisted oven, 170 degrees Celcius was slightly too hot which caused the edges to be a bit burnt. It was done within 1 hour. If I make this cake again I will put the oven at 160 degrees Celcius. I think this is something you need to try out a bit, because every oven is slightly different.
- When I was making the chocolate to drizzle over the top, something went wrong with the white chocolate. I don't know why this is, it might have been the temperature or the combination with the butter because when I melted white chocolate without butter for the sponge it worked fine. I couldn't use the chocolate anymore (that's why there is no white chocolate over my cake). I would recommend melting the white chocolate without butter, also because white chocolate already has quite a lot of fat itself.

This is what my cake looks like from the inside, cool right? I really like the look of marbled cakes!


Oh and the cake also tastes great, the taste of the dark chocolate comes through really nicely in the sponge, it's not too strong. The chocolate on top is a bit strong, although that would have been toned down if I had also had white chocolate to put on top. Even my brother, who is always quite picky, likes it so that's a good sign! I think this is a cake I will make again in the future.

Source of the recipe: Collister, Linda. The Great British Bake Off How To Bake The Perfect Victoria Sponge and Other Baking Secrets. Random House, 2011. Print.

Have you ever watched The Great British Bake Off?

20/07/2011

Blueberry Muffins


This afternoon I made some delicious (well actually I haven't tasted them yet, but I already made them before and they were delicious) blueberry muffins! And it's actually quite easy to make them, here is the recipe:

According to the book I used, this recipe will make 12 muffins. I got 18 out of it, so I think it really depends on the size of the holes in your muffintray.

Ingredients
115 g very fine granulated sugar
1 tablespoon grated lemonpeel
300 g flour
1 teaspoon baking powder
2 whisked (not sure whether this is the right word to use, but just whisk/mix them with a fork) eggs
2 1/2 dl milk
115 g butter, molten
1 teaspoon vanilla-essence
350 g blueberries (fresh or frozen)

Instructions
Pre-heat the oven to 200 degrees Celcius, gas setting 4. Put 12 paper liners in a muffinplate.

Use a spoon to mix the sugar, lemonpeel, flour and baking powder in a middle-sized bowl. Use a mixer to mix the eggs (remember to whisk them with a fork before doing this),  milk, molten butter and vanilla essence in a different bowl for one minute. Add the dry ingredients to this mixture, add the blueberries and use a spoon to mix everything. It is allowed to be a bit lumpy. Put the mixture in the muffin shapes.

Bake the muffins for 20 minutes. Take the muffinplate out of the oven and leave it for 5 minutes. Take out the muffins and enjoy!

Source: 500 cupcakes by Fergal Connolly

If anyone wants the Dutch recipe, just ask, and I will copy or scan it for you! :]

Are you going to make these muffins?


18/06/2011

Cupcakes!


This is the recipe for the cupcakes I showed you yesterday, they are really quite easy to make! According to the recipe the batch will make 18 cupcakes, but I got 23 out of it.

Ingredients

For the cupcakes:
230 g soft butter
230 g very fine granulated sugar
230 g self-rising flour
4 eggs
1 teaspoon vanilla essence

For the decoration:
Fondant (or marzipan, whichever you prefer) in a colour you like
Decorating icing in a colour you like (the one I used was Wilton decorating icing + Wilton tips)
(for the Dutchies, you can buy both these things at Jamin, at least in my town you can..)

Steps1. Pre-heat the oven at 175 degrees. Take a cupcake tray and put cupcake shapes in the holes.
2. Put all the ingredients for the cakes in a bowl and use a mixer to mix them for 2-3 minutes. You should end up with a light, creamy mixture. Scoop this into the shapes in the cupcake tray.
3. Bake the cupcakes for 20 minutes. If you only have a cupcake tray for 12 cupcakes, you will need to bake twice.
4. Take the cupcakes out of the oven and let them cool down.
5. Spread out some powdered sugar over your working area so that the fondant does not stick. Take the fondant and roll out untill it is as a thin as you want it. Use cookie cutters to cut out different shapes.
6. Use a little bit of plain icing (mix powdered sugar and water) to stick the fondant on the cupcakes.
7. Now decorate the cupcakes with the icing. You can make any pattern or shape you like. The Wilton tubes I used are quite easy, you put a tip you like on it and squeeze.

Enjoy! :]

Source recipe: 500 cupcakes by Fergal Connolly

09/04/2011

Cookies!


I baked these cookies yesterday, and they turned out really nice. It was the first time I tried baking cookies with 2 colours, but they look and taste really nice!

Here is the recipe:

Chocolate-vanilla spirals

I got 27 cookies (of which some didn't turn out perfect) out of this recipe, eventhough the book says 36.

Ingredients
225 g butter, soft
115 g fine sugar
325 g flour, plus some extra
1 tablespoon cocoa powder
1 teaspoon vanilla essence

Instructions
1. Prepare 2 baking trays. Mix the butter and sugar untill you have a light mixture. Take half of this mixture and put it in a different bowl, and mix 150 g flour and the cocoa powder through it. Stir the vanilla essence through the other half of the mixture and use a siff to add 175 g flour to this. Make a dough out of both mixtures.
2. Prepare your working area with some flour, so your dough doesn't stick. Rol out both pieces of dough to form rectangles of approximately 20 x 28 cm. Put the chocolate dough on a sheet of baking paper and put the vanilla dough on top of it. Carefully roll up the dough from the long side, using the baking paper as a help. Wrap the dough in the baking paper and leave it in the refridgerator for at least 1 hour, so it can get stiff.
3. Preheat the oven to 180 degrees Celcius/gas oven setting 4. Take the dough out of the baking paper and cut slices from it. Put the cookies onto the baking trays and bake them for 10 - 15 minutes, untill they are gold-brownish. Leave the cookies to cool for 2 minutes and then put them on a tray to cool down further.

Enjoy!

I translated this recipe from the book 'Bakken - de beste recepten uit de hele wereld' written by Lisa Scargo.